Turning a Fixer-Upper Into Your Dream Home

There’s something deeply satisfying about walking into a worn-out home and seeing possibilities instead of problems. Peeling paint becomes a future accent wall. Outdated tile becomes a clean, modern surface. A cramped layout becomes an open, welcoming space filled with light.
But turning a fixer-upper into your dream home isn’t just about aesthetics. It’s about making smart, sustainable decisions that protect your investment, improve daily comfort, and lower monthly utility bills over time. A successful renovation is rarely about one dramatic transformation. It’s about a hundred practical decisions made in the right order.
This guide will walk you through that process—strategically, realistically, and with long-term livability in mind.
Start With a Whole-Home Assessment Before Making Cosmetic Changes

It’s tempting to start with paint colors and Pinterest boards. But if you begin with cosmetic upgrades before understanding the structure of your home, you could end up undoing your own work.
Before anything else, schedule a thorough inspection of the property’s core systems and structural elements. This includes the roof, attic ventilation, foundation, plumbing, and electrical.
One of the first calls many homeowners should make is to a roofing contractor. Even if the roof “looks fine,” hidden issues like poor flashing, inadequate ventilation, or aging underlayment can cause energy loss and moisture damage. A compromised roof doesn’t just lead to leaks—it drives up heating and cooling costs and shortens the lifespan of insulation.
Walk through the home and make two lists:
- Immediate structural or safety concerns
- Functional but outdated elements
Structural issues always come first. That means stabilizing foundations, addressing water intrusion, repairing framing, and ensuring the building envelope is secure. Improving insulation and sealing air leaks at this stage can dramatically lower energy bills before you ever touch a cosmetic detail.
A homeowner once shared that they installed brand-new hardwood floors only to discover roof leaks months later. The repairs required tearing up sections of the new flooring. That’s the kind of expensive mistake a careful assessment prevents.
Think of this phase as strengthening the bones of the house. Design can wait. Stability cannot.
Test and Upgrade Essential Systems for Health and Safety
Older homes often hide inefficiencies in the systems you can’t see. And those inefficiencies quietly drain your monthly budget.
Start with water quality. If the home relies on older plumbing or well water, testing for contaminants is a smart first step. Installing modern water purifiers can improve taste, remove harmful substances, and even extend the life of appliances by reducing mineral buildup. Cleaner water also reduces strain on dishwashers and washing machines, helping them run more efficiently.
Beyond water, evaluate:
- The age of the HVAC system
- The condition of the ductwork
- The electrical panel capacity
- Insulation levels in the attic and walls
An outdated HVAC unit may run constantly without properly conditioning the home. Sealing duct leaks and upgrading insulation often deliver faster savings than replacing the unit outright.
Electrical panels in older homes were not designed for modern energy demands. Upgrading to a higher-capacity panel improves safety and allows for future efficiency upgrades like EV chargers or high-efficiency appliances.
While these improvements aren’t glamorous, they create a healthier living environment and set the stage for lower utility costs over the long term. A fixer-upper becomes sustainable when the systems supporting it are efficient and safe.
Set a Realistic Renovation Budget (Including Cleanup Costs)

Renovation budgets often underestimate one major category: waste removal.
Demolition generates debris quickly—old drywall, cabinets, tile, carpeting. Without a plan, piles accumulate and stall progress. Renting a roll off dumpster at the beginning of major renovation phases keeps the job site organized and safe.
Choosing the right dumpster rental service matters more than people realize. Look for transparent pricing, flexible rental windows, and appropriate container sizes. Oversized containers waste money. Too small, and you’re scheduling extra hauls.
Beyond debris removal, build your budget with clarity:
- Break down costs room by room
- Include labor, materials, permits, and inspection fees
- Add a 15-20% contingency buffer
- Account for temporary housing if necessary
Many homeowners experience “budget fatigue” halfway through renovations. Costs add up. Unexpected plumbing repairs appear. Materials backorder. A realistic financial plan prevents emotional decision-making.
When you know exactly what you can afford—and where flexibility exists—you avoid sacrificing long-term efficiency for short-term savings. Sometimes spending more upfront on insulation or higher-quality windows reduces decades of energy costs.
Your budget should reflect not just what the house will look like, but how it will perform.
Create a Renovation Timeline That Prevents Overwhelm
Renovations rarely move in a straight line. Materials are delayed. Contractors reschedule. Inspections reveal surprises. A thoughtful timeline absorbs these variables instead of collapsing under them.
Some homeowners choose to renovate before moving in. Others live through the process. If you fall into the second group, coordinating logistics becomes essential. Hiring a local moving company to temporarily store furniture during flooring or kitchen work can protect your belongings and streamline progress.
When mapping your timeline, think in phases:
- Structural and mechanical upgrades
- Insulation and air sealing
- Major layout changes
- Flooring and finishes
- Exterior improvements
Working top-down (roof to foundation) and inside-out prevents rework. For example, complete ceiling repairs before installing new floors.
Expect emotional ups and downs. There will be weeks when nothing appears to change. Then suddenly, in a matter of days, a space transforms.
A flexible timeline reduces stress. It allows you to prioritize efficiency improvements first—like insulation or HVAC adjustments—so that even before the home looks complete, it begins functioning better.
Upgrade Flooring to Transform the Entire Home’s Feel
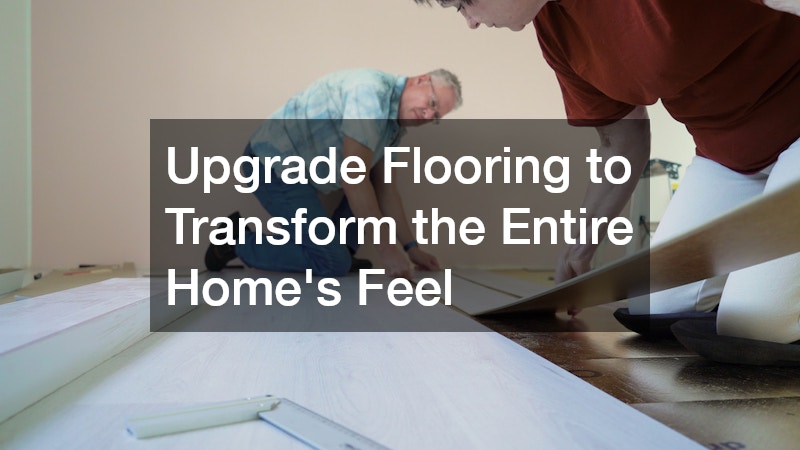
Flooring dramatically affects comfort, acoustics, and energy performance. Cold tile over an uninsulated slab feels different than engineered hardwood over a sealed subfloor.
Before selecting materials, consider how each room is used. Do you have pets? Kids? High humidity?
Working with experienced flooring contractors ensures proper installation and subfloor preparation. Poorly installed floors can create gaps, uneven surfaces, and even heat loss if the underlayment is inadequate.
Material choices also influence efficiency:
- Cork and certain engineered woods provide natural insulation
- Luxury vinyl plank resists moisture and improves durability
- Tile works well with radiant heating systems
Consistency matters. Running the same flooring throughout common areas improves visual flow and can make smaller homes feel larger.
One homeowner replaced mismatched flooring with a single, continuous material and noticed not just aesthetic improvement, but reduced drafts after properly sealing the subfloor.
Flooring isn’t just a surface. It’s part of the home’s thermal envelope and comfort strategy.
Modernize the Kitchen for Maximum Impact
Few spaces affect daily life—and resale value—like the kitchen.
Rather than gutting everything immediately, evaluate what truly needs replacement. Cabinets in good condition can often be refaced or repainted. Layout adjustments, improved lighting, and updated appliances may deliver more functional improvement than cosmetic upgrades alone.
Selecting durable kitchen countertops is both a design and performance decision. Quartz offers low maintenance and strong durability. Butcher block provides warmth but requires sealing. Stone options vary in porosity and maintenance demands.
Energy efficiency upgrades matter here too. Modern refrigerators, dishwashers, and induction cooktops consume less electricity and water than older models.
Improved task lighting reduces the need for excessive overhead fixtures. Installing under-cabinet LEDs can make the space brighter while lowering overall wattage use.
The goal isn’t just beauty. It’s creating a kitchen that supports everyday living without driving up monthly bills.
Improve Curb Appeal Before Tackling Interior Details

The outside of your home protects everything inside it. Ignoring exterior upgrades can undermine interior improvements.
Start with the basics: siding condition, paint quality, drainage, and fencing. A deteriorating wooden fence not only looks neglected but can compromise security and property value.
Walk the perimeter after a rainstorm. Notice how water drains. Pooling water near the foundation increases long-term risk.
Simple exterior improvements often include:
- Repainting trim
- Sealing cracks in siding
- Cleaning gutters
- Replacing outdated exterior lighting
Energy efficiency begins outside. Sealing exterior penetrations and improving weather stripping reduces drafts. Even landscaping choices—like strategically planted trees—can provide natural shade and reduce cooling costs.
Curb appeal isn’t superficial. It’s part of protecting your investment and reducing environmental strain.
Clear and Reclaim Outdoor Space for Future Projects
Many fixer-uppers come with neglected yards. Overgrown shrubs, decaying trees, and leftover construction debris can limit potential.
Removing hazards early creates flexibility later. Stump grinding, for example, eliminates tripping risks and opens space for patios, gardens, or improved drainage solutions.
Clearing brush and trimming trees also increases sunlight exposure. In colder climates, this can reduce heating demands by allowing more natural warmth into the home.
One homeowner delayed yard cleanup for years. When they finally cleared old tree stumps and debris, they discovered space for raised garden beds and better airflow around the foundation.
Outdoor improvements don’t just enhance appearance. They influence moisture control, pest prevention, and even energy performance.
Build Functional Outdoor Living Areas That Extend Usable Space

As your home improves, consider how outdoor living areas can expand usable square footage without increasing energy costs.
A thoughtfully designed patio or deck becomes a second living room during mild weather. Adding a louvered pergola allows adjustable shade and ventilation, helping you enjoy outdoor space in multiple seasons without relying heavily on indoor climate control.
Design outdoor areas with purpose:
- Dining space near the kitchen
- Lounge space oriented toward privacy
- Integrated lighting for safety
Choosing durable, low-maintenance materials reduces long-term upkeep and waste.
Outdoor living areas also encourage natural ventilation. On pleasant days, opening windows and using cross-breezes reduces reliance on HVAC systems.
Your dream home isn’t confined to four walls. It flows outward.
Prioritize Projects That Increase Long-Term Value
At some point, every renovation decision comes down to trade-offs. Do you splurge on custom tile? Or invest in better insulation?
This is where many homeowners quietly derail their long-term goals. It’s easy to fall in love with finishes you can see and touch every day. It’s harder to get excited about improvements hidden behind drywall. But performance upgrades compound in value over time, while purely cosmetic upgrades often plateau.
Projects that improve energy efficiency and structural integrity consistently deliver stronger long-term value than purely aesthetic upgrades.
Think about how your home functions across all four seasons. If it’s drafty in winter and overheated in summer, no backsplash or statement lighting fixture will compensate for the discomfort—or the energy bills. A home that maintains steady indoor temperatures with minimal HVAC strain feels better to live in and costs less to operate.
Consider:
- Upgrading insulation
- Installing energy-efficient windows
- Sealing air leaks
- Replacing outdated appliances
Upgrading insulation is one of the most cost-effective changes you can make, especially in older homes with minimal attic coverage. Proper insulation stabilizes indoor temperatures, reducing the frequency of HVAC cycles and lowering utility costs over time.
Installing energy-efficient windows reduces drafts and thermal transfer. Older single-pane windows often leak conditioned air, while modern multi-pane designs significantly improve performance. They also reduce outside noise and eliminate cold spots near exterior walls.
Sealing air leaks is another underestimated upgrade. Small gaps around doors, windows, and utility penetrations allow conditioned air to escape. Caulking and weatherstripping may not be glamorous, but they create immediate improvements in comfort and efficiency.
Replacing outdated appliances contributes to measurable savings as well. Older units can consume significantly more electricity and water than modern high-efficiency models. Even if they still function, they may be quietly increasing monthly bills.
You’ll also notice fewer hot and cold spots and less frequent HVAC cycling. Over time, that consistency reduces strain on major systems and extends their lifespan.
A balanced approach works best. Combine performance upgrades with carefully chosen design improvements. If you’re replacing windows for efficiency, select styles that complement your home. If you’re opening walls for insulation, coordinate that work with cosmetic updates to avoid duplicating labor.
Avoid over-improving for the neighborhood if resale is a consideration. Instead, focus on creating a home that performs exceptionally well within its market.
Your dream home should reflect your taste—but also operate intelligently and sustainably. Prioritizing how the home functions ensures you enjoy comfort and lower operating costs long after design trends change.
Know When to DIY and When to Hire Professionals

DIY projects can save money and build pride of ownership. Painting, landscaping, and minor cosmetic updates are often manageable.
But structural work, electrical upgrades, plumbing changes, and roof repairs demand professional expertise. Mistakes in these areas can increase utility costs, reduce safety, and void insurance coverage.
Vet contractors carefully:
- Verify licenses and insurance
- Request references
- Get detailed written estimates
- Clarify project timelines
The right professional partnership often leads to better efficiency outcomes. Experienced tradespeople understand how small installation details affect long-term performance.
Being strategic about where you invest labor money protects both your home and your budget.
Avoid Common Fixer-Upper Mistakes That Cost Time and Money
Many renovation regrets share common roots: rushing, underestimating costs, and skipping inspections.
Avoid starting projects without permits. Address hidden issues immediately. Resist the urge to follow trends that may not age well.
One of the biggest mistakes is prioritizing visible upgrades over energy performance. A stunning kitchen won’t offset sky-high heating bills caused by poor insulation.
Slow, thoughtful progress wins.
Expect setbacks. Build contingency plans. Stay focused on creating a home that functions beautifully—not just one that photographs well.
Bringing It All Together

Turning a fixer-upper into your dream home is less about dramatic transformations and more about disciplined choices. It’s about reinforcing structure before selecting finishes. It’s about upgrading systems before upgrading style. It’s about making improvements that reduce waste, lower monthly utility bills, and support healthier living.
When you approach renovation with patience and long-term thinking, each phase builds upon the last. Over time, what once felt overwhelming becomes cohesive. The house stops fighting you and starts supporting you.
And that’s when a fixer-upper truly becomes home.